Faux leather is the material that teaches you how to cut faux leather on a Cricut the expensive way. You load a sheet, trust the preset, pull the mat out, and the whole thing stretches instead of separating. The blade was dull, the pressure was too high, and the sheet you just sacrificed cost you real money.
Here is the part nobody tells beginners: faux leather is not a hard material to cut. It is a hard material to cut twice with the same blade. It is a fabric backing bonded to a polyurethane face, and that backing is what dulls blades and what makes pressure behave differently from color to color in the same pack.
I have cut enough of it in six years of running a sticker and vinyl shop, and now in weekend classes, to know the workflow below works on a machine with a pressure dial and a manual blade housing just as well as it works on a machine with a material menu. The machine matters less than three things: a sharp blade, the correct depth, and a test cut you actually run before you commit a full sheet.
Why you should trust me
I ran an Etsy sticker and vinyl shop for six years while raising two kids, then turned it into a full-time business with weekend craft classes. I own three machines, an older Explore, a Maker 3, and a borrowed competitor unit I keep around for comparison. I have cut through more than 200 rolls of vinyl and dozens of mats, and I keep a notebook of blade types, pressure settings, and which materials lie about their thickness.
Faux leather lies more than anything else in the drawer. That notebook is why I can tell you where most ruined cuts come from, and it is almost never the machine.
How I judge a machine and a sheet
Before the steps, here is the filter I run every cutter and every material through.
For a machine, I look at four things. Can you adjust blade depth by hand, or are you stuck with whatever the housing was set to at the factory? How granular is the pressure control? Does the machine force you into a cloud app and a subscription to cut a simple shape? And how does it handle a material that needs two passes, because faux leather usually does.
For a sheet, I look at whether the backing holds together when you peel it, whether the face marks when you press a brayer across it, and whether the thickness is consistent across the pack. A multi-color pack is not one material. It is 32 slightly different materials that happen to share a listing, and the dark colors often cut differently from the light ones.
That is the whole test. No lab bench, no meter. Just a scrap, a blade, and a willingness to throw away one cut to save ten.
The two things you need before your first cut
You need a cutter and you need something to cut. That sounds obvious, but the mistake beginners make is buying the machine first and then discovering they have no idea what material to feed it.
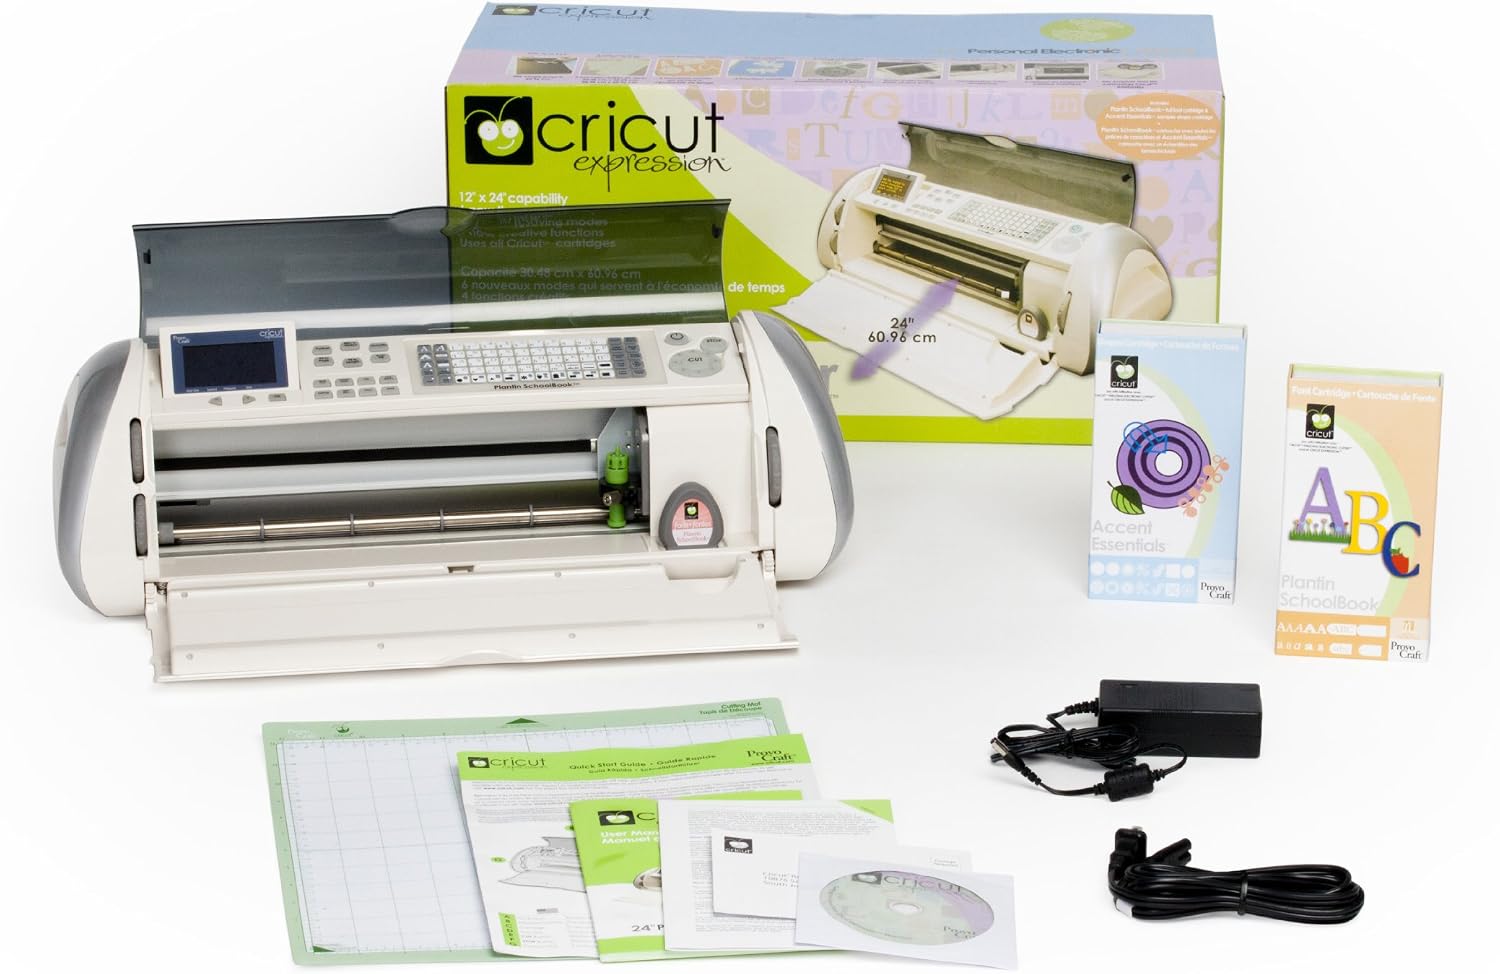
The machine: Cricut Expression Electronic Cutting Machine
 Visit on Amazon →
This is an older generation Cricut, which means your settings live on the machine rather than in a material dropdown. For faux leather, that is less of a handicap than it sounds. The dial-and-test workflow is exactly what this material demands anyway, because no preset knows how thick your specific sheet is.
Check current Amazon price before you commit, and read the listing carefully. Older machines come with older software support, and that is the thing I would verify first. If the machine needs a specific cartridge ecosystem or an app that has moved on, you want to know that before the box arrives, not after.
Flaws but not dealbreakers: An older cutter will not hand you a faux leather preset, so you are responsible for blade depth and pressure. If you want a machine to make those decisions for you, this is not the one. If you want a machine that cuts flat material reliably and does not nag you about a subscription mid-project, the simplicity is the point.
Anyone cutting flat sheets, vinyl, paper, and backed faux leather who is comfortable testing settings will get along with it fine.
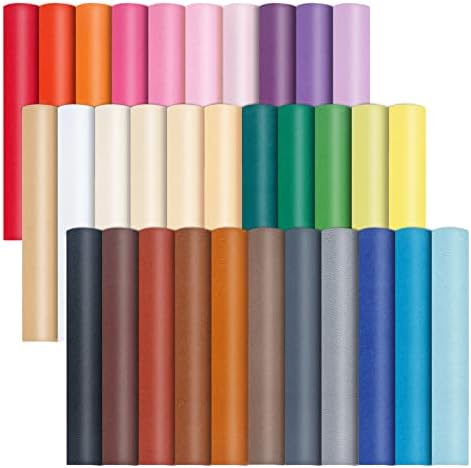
The material: 32 Pieces 8×12 inches Colored Faux PU Leather Sheets
 Visit on Amazon →
A 32-piece pack of 8 by 12 inch PU leather sheets is the right way to start, for one reason: volume makes you brave enough to test. When you have one expensive sheet, you skip the test cut and then ruin the sheet. When you have 32, you cut a two-inch square first and nobody dies.
The 8 by 12 size fits a standard mat with room to spare, and the color range means you can match a project without ordering a whole hide. Check current Amazon price, then do the math I describe further down before you decide how many packs you need.
Flaws but not dealbreakers: Thickness in a multi-color pack is rarely identical from sheet to sheet, so treat every color as a new material until you have tested it. Some sheets may also arrive with a curl from shipping. Lay them flat under a book for a day before cutting.
Anyone making earrings, bookmarks, keychains, small pouches, or appliqué pieces will find this pack covers a lot of projects before it runs out.
The workflow: cutting faux leather step by step
This is the sequence I teach. It works whether your machine has a dial or a menu.
Step one: run a test cut on a scrap of the same color. Cut a one-inch square from the corner of the sheet you plan to use. Not a different sheet, not a different color. Two minutes here saves an entire project.
Step two: pick your blade. Start with a sharp fine-point blade. If the sheet is thick and heavily backed and the fine-point blade tears the face instead of slicing it, move up to a deep-point blade. What you should not do is reach for a deep-point blade first because it sounds more serious. A deep-point blade on a thin sheet drags and stretches the material.
Step three: set blade depth so the blade just clears the backing. Load the housing, then look at how far the tip protrudes. You want it past the face and through the backing, with barely anything left over. Too shallow and you get a kiss cut that never releases. Too deep and you cut into the mat and drag the sheet.
Step four: start with lower pressure than you think you need. This is the counterintuitive one. Most people respond to a failed cut by adding pressure, and pressure is what stretches faux leather. Add passes instead. Two lighter passes give you a cleaner edge than one heavy pass almost every time.
Step five: secure the sheet to the mat. Press it down with a brayer or a rolling pin, working from the center out. Small pieces need tape at the corners, because faux leather is stiff enough that a narrow strip will lift and catch. If your mat has lost its grip, clean it before you blame the material.
Step six: set multiple passes. On a dial machine, that means running the same cut twice without unloading the mat. In software, set the number of passes. Do not unload between passes. The registration is what keeps the second pass on top of the first.
Step seven: test the release before you unload. Lift one corner with a weeder or a pin. If the material separates cleanly and the backing stays intact, you are done. If it tears, or if the cut line is fuzzy, do another pass before you move the mat.
Step eight: weed and finish. Peel the surrounding material away slowly, holding the sheet flat rather than pulling upward. Then finish the piece the way your project requires, whether that is sewing, gluing, or punching hardware.
Mistakes that wreck a faux leather cut
Using a blade that already cut vinyl. Vinyl dulls a blade gradually, and faux leather is the material that reveals it. Keep a blade that only touches backed materials if you cut a lot of them.
Cranking pressure to fix a shallow cut. Pressure stretches. Passes slice. If your cut failed, your depth was wrong or your blade was dull, and more pressure will just make a mess of the edge.
Skipping the test because the last sheet worked. Colors vary. A black sheet and a white sheet in the same pack can want different settings, and you will not know which until you cut.
Cutting small pieces without tape. A one-inch earring blank on a standard mat will lift on the second pass. Tape it or use a grip mat that is actually still sticky.
Trusting a preset over your own eyes. A material preset is a starting point built for a sheet the software developer had on their desk, not the one on yours. Adjust from there.
What it costs per cut
I cannot quote today's prices, so do the math yourself. Take the pack price, divide by 32, and you have the cost of one full 8 by 12 sheet. Then ask how many pieces you get from that sheet. A sheet of earring blanks, for example, might yield a dozen pairs, which puts the material cost per pair well under a dollar in most cases.
The blade is the variable people forget. Faux leather dulls blades faster than vinyl does, and a blade is a consumable the same way a mat is. If you cut a lot of backed material, budget for blades the way you budget for sheets. Check current Amazon price on both, and run the numbers on your actual project size instead of guessing.
That is the whole calculation. Material cost per finished piece, plus blade life, plus the mat you will eventually replace. Everything else is noise.
Quick answers
Do I need a special blade? No. A sharp fine-point blade handles most faux leather. A deep-point blade is a fallback for thick, heavily backed sheets, not a requirement.
Can I cut faux leather without a mat? On older machines you use a mat. Some newer machines offer a matless setting for backed materials, but with an older cutter, plan on a mat and keep it clean.
Why is my cut fuzzy on the edges? Usually a dull blade or too much pressure. Drop the pressure, add a pass, and try a fresh blade before you change anything else.
The bottom line
Faux leather rewards patience and punishes shortcuts, which makes it a good teacher. Get a sharp blade, set your depth so it just clears the backing, use light pressure with two passes, and test on a scrap every single time you switch colors. Do that and the material stops being the enemy.
Start with a machine you understand and a pack of sheets you are not afraid to waste, and the rest is repetition. Your first cut will be mediocre. Your fifth will look like you have been doing it for years.